|
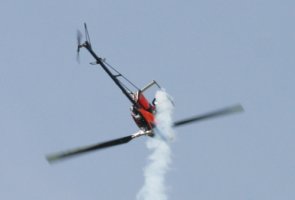
CSM Flybarless Synergy N9
CSM 'Head-lock' Flybarless Synergy Demo ---------> Video Click Here
27th May 2008
Clubman 3D Synergy Demo posted above!
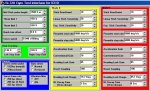
My current gyro and cyclock settings below (flying in Mode1 gyro settings):
 |
|
 |
| Elevator Gyro Settings |
Aileron Gyro Settings |
Cyclock 1 Settings |
20th May
Clubman 3D was a Great Success and my Synergy was flying better than ever this past weekend!!
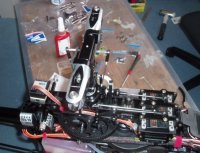
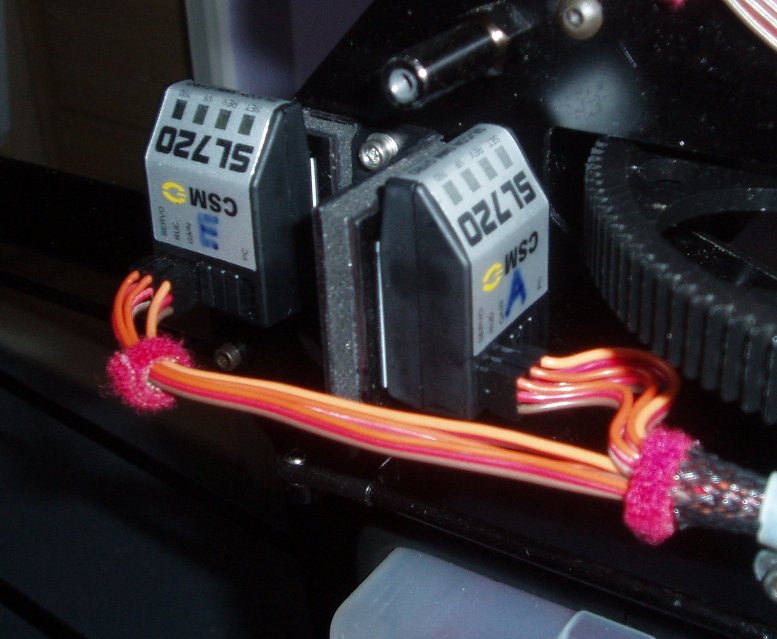
Following the Park Hall flyin I changed my gyro damping/mounting (see pictures below). I made up some 35x35mm CF plates and made a CF Plate and CSM mounting pad sandwich, with the Gyro mounted on top. By increasing the mounting footprint of the gyros, the mounting is stiffer but retains good vibration resistance and it certainly worked with improved stops from agressive cyclic inputs.
 |
 |
12th May
Video of my Flybarless N9 at the Park Hall Helicopter Club Flyin ---------> Video Click Here
Thanks to Lee (aka Made2Fade on RcHeliaddicts for the filming)
Before the Park Hall Flyin I had also just fitted a New 91 SZH as the SZH I had fitted previously (2 years old) was slowly dying !!
Also at the Park Hall Flyin I had a few strange wobbles with the model during really aggressive stops from fast flight that I had not seen previously. A check over the model highlighted that my cyclic gyro mounting pads were starting to become loose/breaking up. It was a very hot day, not sure if that had anything to do with it or not. I've never needed to replace the CSM mounting pads I used for my tail gyros because of them becoming loose/breaking up. But then I do mount the gyros differently for the tail compared to the cyclic gyros.
Wayne Osbourne commented at Charmouth that I had my cyclic gyros mounted quite loose also, this may explain why the pads have started failing (about 4 gallons use), as the gyros are free to wobble more !!
I'll be replacing my pads and maybe working on some custom mounting for the gyros this week, ready for Clubman 3D at the weekend.
5th May
CSM have updated there website with new reccommended starting settings for the two gyros (dated April 2008). Check out the link ---------->
CSM Cyclock 1 and Gyro Settings
4th May
I've just fitted the CSM Revlock 30 to my Synergy. As I have no spare channels (running DX7) I am running the Revlock in manual speed mode. Not setup for collective managament yet, just running as a govenor ATM. Model is flying better with the govenor than before.
I've increased my dual rate settings on my aileron channel so that I have the same feel around centre for the aileron as I did the elevator.
Aileron Dual Rate - 95%
Elevator Dual Rate - 87%
CSM Flybarless Quick Setup Guide:
With CCPM heli and CSM flybarless, you need to run a Cyclock 1 (CL1) and 2xCSM 720 gyros.
1) Firstly make up your flybarless head and install to the model.
2) I found with the TB head (see below for pics) that I ended up extending the 3 links from the
bellcranks to the swash, so that the swash sits more central between the
upper bearing block and the bottom of the TB head.
3) Now install the CL1 ONLY, setup as per the instructions. Instructions
are pretty good, just follow the steps. Set the Pitch range to about +/- 11 deg and Cyclic range to +/- 10
deg. This is what I had set at Charmouth.
4) Now mount your gyros to the model, pictures below of how I did
mine.
5) Wire up as on the CSM wiring diagram below. Diagram shows Aux 3 for gain, you could use any spare channel that is adjustable via a 2-way switch. You
could run seperate gain for Elev and Ail, but I use a Y-lead, as in the CSM
wiring diagram. I only have a DX7 so I am limited on channels !!
6) Set the gyro and CL1 settings for flybarless operation - settings below
7) Double check the cyclic range, with your internal gyro end points at +/- 150
percent it should be the same as in (3)
8) Word of caution, getting the model of the ground is the most nervous bit for
me. On the ground I run the cyclic gyro's with 1s heading lock decay. This
allows the swash to return to neutral setting on the bench/ground, then when
the headspeed is upto speed I flick into my other cyclic gyro mode/gain were
I have 0s decay setting and take-off.
By observing the behaviour of the swashplate on the bench with and without heading lock decay you should understand the reasons for me spooling up my heli this way!!
9) For Tx gain I started with 50% either way. I am now upto about 80% on my Tx flying mode gain. I have not really maximised this yet though.
April 2008
After a few gallons playing with the CSM settings and with the help of a little artcle by Russ Deakin I basically settled on the values in Russ' Article. With the exception of heading lock decay which I have been running at 0sec.
Russ Deakin Article Click Here ------> Click Here
Convinced about the benefits of Flybarless Flight I decided to change my rotorhead to something more purpose made. I was also worried about the carbon arms breaking, as there is alot of load going through these!!
A quick chat with Carl Bonta from Hyperformance I had a TB Head on its way from the US. The head built easily and looks gorgeous. Setting up was easy, I didn't need to change the travel of my servos/cyclock settings as the spacing of the balls on the blade grips was the same as my previous head.
The BIG Advantage of this head is that it reduces the distance between the blades and boom by about 27mm.
This is the setup I ran at Charmouth to good success !!
March 2008 - Flybarless N9 Journey Begins:
Early 2008 I decided to give Flybarless flight a try. Being sponsored by CSM, I naturally choose to go the CSM flybarless route. Next I choose to run Flybarless on my Synergy N9 rather than my Knight 3D models because I knew Duncan Osbourne had been running a CSM flybarless setup on his Synergys during 2007 with success, so figured I could just 'borrow' his CSM gyro settings to get started with minimal hassle!
Mechanical Setup:
Firstly I set about converting the head on my model. I started by selecting a Vario Swash Driver unit to locate the inner ring of the swashplate. I took the standard Hyperformance blade grips and added 10mm standoffs to the carbon arms with a ball on the end.
The first two pictures below showed the first modified head I flew.
Electronic Setup:
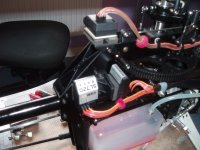
I decided to keep mounting my two gyros as simple as possible. I mounted both gyros to the rear of the model on the right side (away from the exhaust side!!). I also wanted to mount the gyros as close to each other as possible, so that they would hopefully experience the same vibration levels etc:
The elevator gyro is directly mounted to the frames with one large square CSM mounting pad.
The aileron gyro is mounted onto the frames using a 90deg angle bracket that is from the JR Vibe/Vigor (as the undercarriage to frame reinforcement bracket). Again I used one large square CSM mounting pad. Also important to ensure the gyro mounting face of the bracket is parallel to the mainshaft. Easy to acheive with a spirit level buble.
With Gyros mounted next job was to connect all the little boxes of tricks together. Below is a Wiring Diagram to help:
 |
| Wiring Diagram |
Below are my initial Gyro and Cyclock settings, these were taken from the CSM website (settings as of 20th March 2007). They were a good 'safe' starting point. Note the travel ranges on the Cyclock will be dependant on your mechanical setup. I used a pitch gauge to set the pitch and cyclic range.
| |
|
| Elev/Ail Gyro Settings |
Cyclock 1 Settings |
|